Custom combat animations can take your game to the next level by making battles more dynamic and immersive. Whether you’re a game developer, modder, or an animation enthusiast, knowing how to create custom combat animations is essential for crafting engaging gameplay experiences. In this blog post, we will walk you through the step-by-step process for creating custom combat animations in Eskyrim, focusing on the essential tools and techniques you need to get started.
Creating smooth, natural combat animations can be a challenge, but with the right guidance, you’ll be able to design animations that enhance your game. This step-by-step guide will walk you through everything from initial planning to implementation within Eskyrim.
Key Points to Remember:
- Planning is crucial to designing animations that are smooth and realistic.
- Proper tools and software are necessary for creating high-quality animations.
- Testing and iteration are key to perfecting your custom combat animations.
What Are Custom Combat Animations and Why Are They Important?
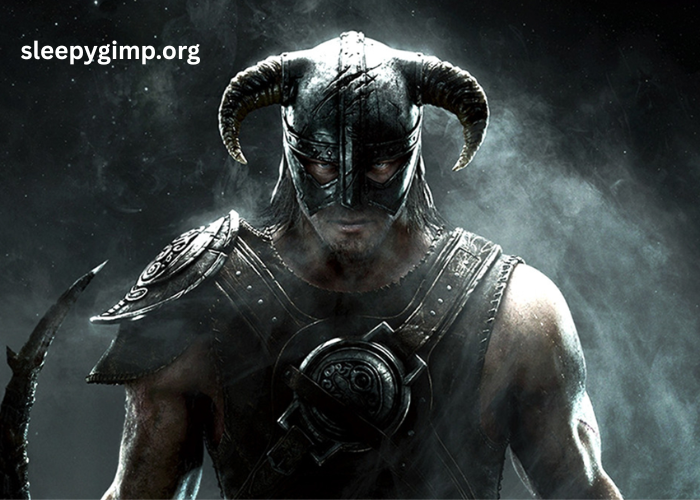
Custom combat animations refer to unique, tailored movements designed specifically for in-game characters. These animations determine how characters attack, defend, dodge, and interact with enemies during combat. In games like Eskyrim, combat animations play a major role in the overall gameplay experience.
Why Custom Animations Matter
Creating custom combat animations enhances the immersion of the game. Pre-made animations, while functional, can often feel generic or lack the fluidity and uniqueness that custom animations bring. Custom animations give players the sense that the character’s actions are more dynamic and responsive to the environment, making the combat experience more enjoyable.
Additionally, custom combat animations allow you to better reflect the abilities and personality of the character. Whether it’s a quick, agile character or a bulky, powerful warrior, the combat animation can help express these traits and make the gameplay feel more tailored.
Reminder: Custom combat animations also help differentiate your game from others, providing players with a unique visual experience.
What Tools Do You Need to Create Custom Combat Animations?
To create custom combat animations, you need a set of specialized tools that will allow you to design, refine, and implement these animations into Eskyrim. The right software can make the process much easier and more efficient.
3D Modeling Software
The first tool you’ll need is 3D modeling software, which allows you to create and modify the models that your animations will be based on. Popular choices include:
- Blender: A free, open-source software that offers robust tools for 3D modeling, rigging, and animation.
- Maya: Industry-standard software often used for complex animations.
- 3ds Max: Another professional-level software, which is great for animation.
| Software | Price | Features | Best For |
| Blender | Free | Full range of animation tools, Rigging | Beginners to experts |
| Maya | $1,620 | Advanced animation features, High detail | Professional studios |
| 3ds Max | $1,545 | Versatile animation and modeling tools | Game developers |
Animation Software
For creating and tweaking combat animations, you’ll need an animation tool that allows you to sequence movements. You can use tools like MotionBuilder or Unity to refine animations after creating the basic movements in your 3D modeling software.
Eskyrim Modding Tools
Once your animations are created, you will need tools that integrate your animations into Eskyrim. This is where NIFscope and Animation Viewer come in. These tools allow you to preview, tweak, and implement animations within the game engine itself.
How Do You Plan Combat Animations?
The first step in creating custom combat animations is proper planning. Without a clear plan, your animations can end up looking awkward, unrealistic, or out of place within the game. This step involves determining the purpose of the animation and how it fits into the overall combat system.
Step 1: Define Character Actions
Start by identifying the combat actions that your character will perform. These can include basic attacks, special moves, combos, dodges, and defensive stances. Think about what makes your character unique and how these movements will enhance their personality.
For example:
- A fast, agile character might have quick, fluid attack animations and acrobatic dodges.
- A heavy warrior may have slow but powerful swings and strong block animations.
Step 2: Break Down the Movement
Once you have the actions defined, break them down into smaller steps. Instead of animating the entire sequence at once, focus on key poses and transitions. This helps ensure the animation looks smooth and natural.
Reminder: Don’t forget to consider timing. Combat animations need to have a good rhythm, with appropriate pauses and transitions between movements.
How Do You Create and Refine Combat Animations?
Now that you have your plan and tools in place, it’s time to start creating the combat animations. This involves a mix of 3D modeling, rigging, and animating in your chosen software. Below is a step-by-step process for creating and refining combat animations.
Step 1: Rigging and Skinning
The first step in animation creation is rigging, which involves creating the skeleton or framework for the character. Afterward, you’ll “skin” the model by assigning the mesh to the bones of the rig. This makes sure the model moves naturally in response to the rig’s movements.
Step 2: Blocking Out the Key Poses
Start by creating the key poses for the animation. These are the main frames where the character’s position or action changes dramatically, such as when the character swings a sword or performs a defensive block. These key poses will act as anchors for the rest of the animation.
Step 3: Refining the In-Between Frames
After you have the key poses, focus on the in-between frames, which help smooth out the movement between the key poses. This step can take some time, as you may need to adjust the timing and spacing of the frames to achieve the desired fluidity.
Step 4: Adding Motion and Polish
Finally, add the finishing touches. This includes refining the timing, adding additional details such as weight shifts or secondary motions, and ensuring the animation looks natural. Test the animation in Eskyrim frequently to ensure it flows smoothly.
| Step | Tools Needed | Time Estimate | Purpose |
| Rigging | Blender, Maya | 2-4 hours | Create skeleton and mesh binding |
| Key Poses | Blender, Maya | 3-5 hours | Define character’s main positions |
| In-Betweening | Blender, Maya | 5-6 hours | Smooth transitions between poses |
| Polish | Blender, Maya | 2-3 hours | Add details and refine animation |
How Do You Implement Combat Animations in Eskyrim?
Once you have created your combat animations, the final step is to implement them into Eskyrim. This involves using modding tools like NIFscope and Animation Viewer to preview and refine the animations in the context of the game.
Step 1: Export the Animation Files
The first step is to export your animations from your 3D modeling software. Make sure the files are in the appropriate format (usually .kf or .anim for Eskyrim).
Step 2: Use Modding Tools
Next, use NIFscope to import and preview your animation files. You can also use Animation Viewer to fine-tune the movements and see how the animations will look in the game.
Step 3: Testing and Debugging
After importing the animations into Eskyrim, test them in various scenarios. Make sure the movements look natural, fit with the environment, and don’t conflict with other animations. Debug any issues that arise during testing.
Reminder: Always back up your files before making any significant changes. Testing can sometimes lead to unexpected issues that require rollback.
Conclusion
Creating custom combat animations for Eskyrim is a rewarding process that requires planning, the right tools, and careful execution. By following these steps and refining your techniques, you can develop combat animations that bring your characters to life and enhance the player experience.
Whether you’re creating simple attack movements or complex combos, every detail counts in crafting the perfect animation.
FAQ’s
- What software do I need to create combat animations for Eskyrim?
You’ll need 3D modeling and animation software like Blender, Maya, or 3ds Max, along with modding tools like NIFscope and Animation Viewer for integration. - How long does it take to create a custom combat animation?
It can take anywhere from several hours to a few days, depending on the complexity of the animation and the tools you use. - Can I use pre-made animations for my combat moves?
Yes, you can, but creating custom animations allows for more unique and personalized movements that fit your game better. - How do I test my combat animations in Eskyrim?
Use modding tools like NIFscope to preview animations in the game, and test them within different scenarios to make sure they work smoothly. - Can I modify combat animations after they’re created?
Yes, you can always go back and tweak your animations for timing, smoothness, or to fix any issues that arise during testing.